

Hey there! As a supplier of 6 - person electric golf carts, I've seen my fair share of electrical issues. Checking the electrical connections in these carts is super important to keep them running smoothly. In this blog, I'll walk you through how to do just that.
First things first, let's talk about why it's crucial to check the electrical connections. Electrical problems can lead to all sorts of headaches, like a cart that won't start, battery issues, or even potential safety hazards. By regularly checking the connections, you can catch problems early and avoid costly repairs down the road.
Tools You'll Need
Before you start checking the electrical connections, you'll need a few tools. You'll want a multimeter, which is used to measure voltage, current, and resistance. A set of wrenches or screwdrivers will also come in handy for removing covers and accessing the connections. And don't forget a flashlight, especially if you're working in a dimly lit area.
Step 1: Safety First
Safety is always the top priority. Before you start working on the electrical system, make sure the cart is turned off and the key is removed. This will prevent any accidental shocks or short - circuits. You should also wear safety gloves and goggles to protect yourself from any potential hazards.
Step 2: Locate the Battery and Electrical Components
The battery is the heart of the electric golf cart's electrical system. In a 6 - person electric golf cart, the batteries are usually located under the seat or in a compartment at the rear of the cart. Once you've found the batteries, you'll also need to locate other electrical components like the controller, charger, and wiring harnesses.
Step 3: Inspect the Battery Connections
The battery connections are some of the most important ones to check. Start by looking at the battery terminals. They should be clean and free of corrosion. Corrosion can prevent the proper flow of electricity and cause the cart to perform poorly. If you see any corrosion, you can clean it off using a mixture of baking soda and water. Just make sure to disconnect the battery cables first, starting with the negative cable.
Use a wrench to loosen the battery cable clamps and remove them from the terminals. Then, dip an old toothbrush into the baking soda solution and scrub the terminals and cable clamps. Rinse them off with clean water and dry them thoroughly. Once they're dry, reattach the cable clamps, starting with the positive cable. Make sure they're tightened securely.
Step 4: Check the Wiring Harnesses
The wiring harnesses are the bundles of wires that connect all the electrical components in the cart. Inspect them for any signs of damage, such as frayed wires, cuts, or loose connections. If you find any damaged wires, they should be repaired or replaced immediately. You can use electrical tape to repair minor cuts or frays, but for more serious damage, it's best to replace the entire wiring harness.
Check the connectors at the ends of the wiring harnesses. They should be firmly plugged in and free of dirt or debris. If a connector is loose, you can try tightening it or using a small amount of dielectric grease to improve the connection.
Step 5: Examine the Controller
The controller is like the brain of the electric golf cart's electrical system. It regulates the power flow from the batteries to the motor. Inspect the controller for any signs of overheating, such as a burnt smell or discolored components. Check the wiring connections to the controller and make sure they're secure.
If you suspect there's a problem with the controller, it's a good idea to have it tested by a professional. A faulty controller can cause the cart to run erratically or not at all.
Step 6: Test the Charger
The charger is responsible for keeping the batteries charged. Check the charger for any visible damage, such as cracks or loose parts. Plug the charger into a power outlet and connect it to the cart's batteries. The charger should indicate that it's working properly, usually by displaying a charging light.
If the charger doesn't seem to be working, check the power cord for any damage. You can also use a multimeter to test the charger's output voltage. If the voltage is incorrect, the charger may need to be repaired or replaced.
Step 7: Check the Lights and Other Accessories
Don't forget about the lights, horn, and other accessories on the golf cart. These components are also part of the electrical system. Check the bulbs in the lights to make sure they're working. If a bulb is burned out, replace it.
Inspect the wiring connections to the accessories and make sure they're secure. You can use a multimeter to test the voltage at the accessory connections to see if they're getting power.
Step 8: Recheck and Finalize
Once you've checked all the electrical connections, go through everything one more time to make sure you haven't missed anything. Reconnect any covers or panels you removed during the inspection.
Turn the cart on and test it to make sure everything is working properly. If the cart starts up smoothly and all the electrical components are functioning as they should, then you've successfully checked the electrical connections.
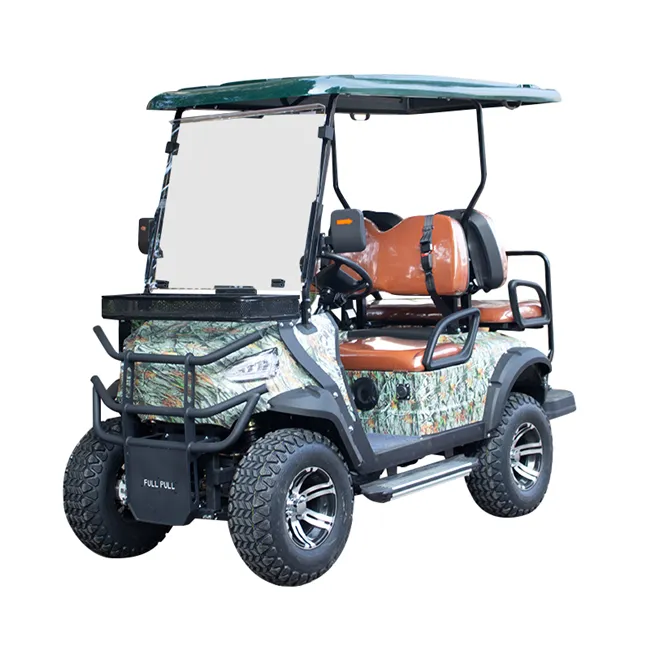

Our 6 - Person Electric Golf Carts
At our company, we offer a wide range of high - quality Electric Golf Carts 6 Seater. Our carts are designed to be reliable, comfortable, and easy to maintain. We also have 5KW Off Road Golf Car options for those who want to take their golf cart off the beaten path. And if you're looking for an adventure, our Off Road Electric Golf Cart is the perfect choice.
If you're interested in purchasing a 6 - person electric golf cart or have any questions about electrical maintenance, we'd love to hear from you. Contact us for more information and let's start a conversation about how we can meet your needs.
References
- General knowledge from years of experience in the electric golf cart industry.
- Manufacturer's manuals for 6 - person electric golf carts.